Killie Korner by Sarah Walker (Feb. 2019 AKA Business Newsletter)
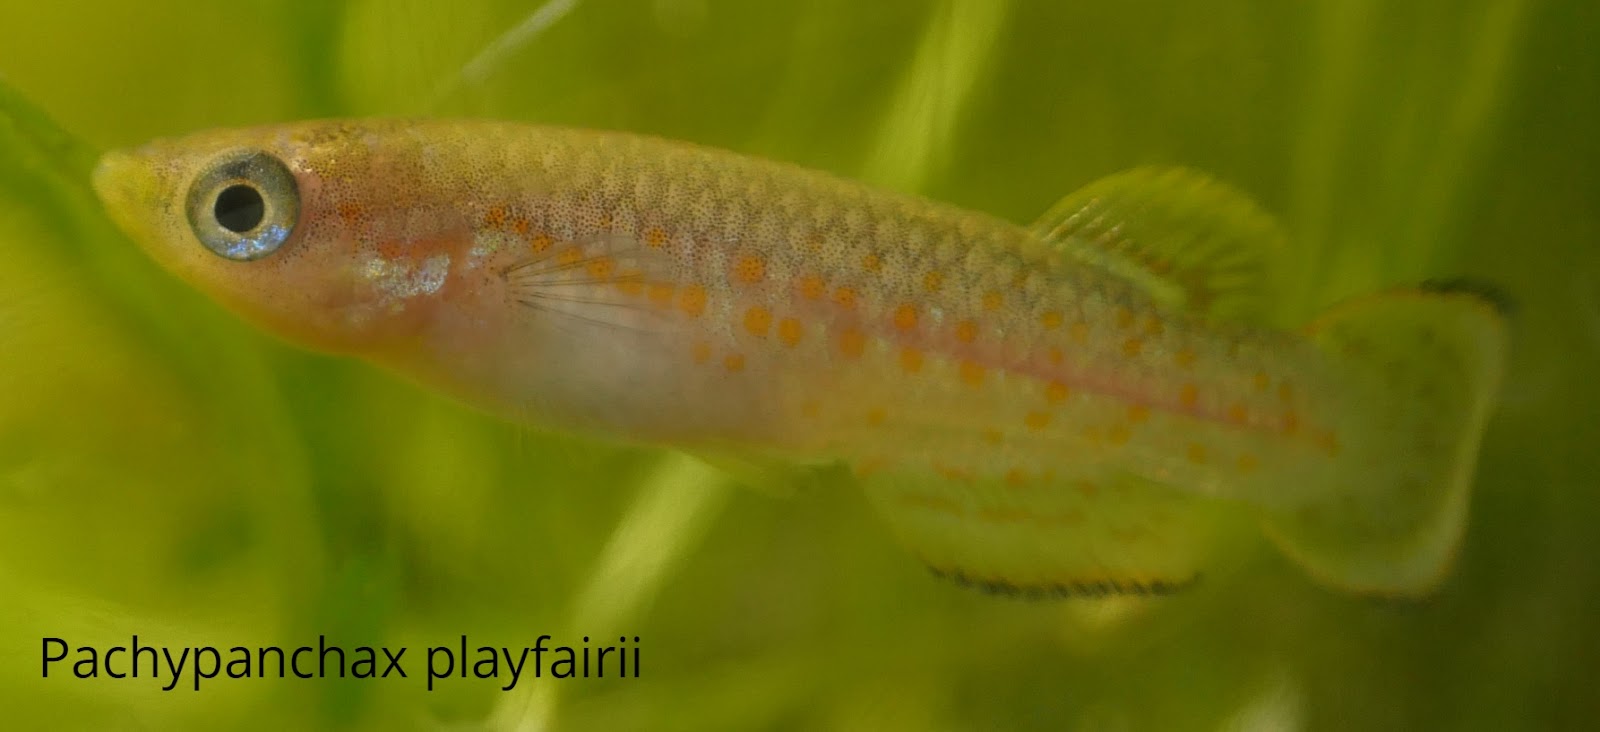
Raising fish from eggs can be a very rewarding experience. Not only do you get to watch your beloved fish grow, but it can also be an affordable way to acquire new species as eggs tend to be cheaper than full grown fish. What is more adorable than baby fish? Although daunting, hatching fry eggs is an easy and enjoyable experience!
Peat moss is a common way that killifish breeders keep eggs safe from fungus as well as delay hatching. Although we collect eggs everyday, we put them on peat so they will all hatch about the same time. Some hobbyists even water incubate the eggs until eyes are clearly visible, then delay on peat. This gives the breeder control over how many fry to raise at one time. While water incubation has many advantages, peat is best for large batches of fry.
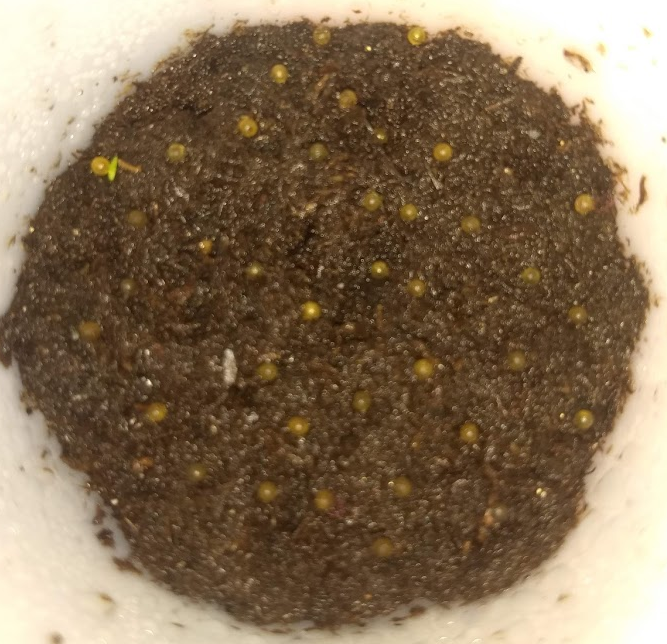
There are many ways of keeping eggs on peat. With annual fish, many breeders take the rung out peat and put it into a ziplock bag. Non annual fish need more humidity than this, and the ziplock method is not suggested. Any small container with a tight light should suffice. The author prefers to use petri dishes. They can be purchased for about .25 a piece when ordered online. Here is a link to where I got mine! They can be ordered in many different sizes and make viewing eggs easy as the dishes are shallow.
Different species have different incubation times on peat. They incubation time will vary based on the temperature at which the eggs are kept. You can look up most South American Annualls here. Here is a summary of some of the most popular ones:
Fp. gardneri 4-6 weeks
Fp. sjoestedti: 6-8 weeks
Notho guntheri 6-8 weeks
Nem. whitei 12-16 weeks
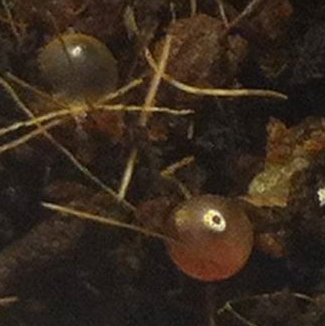
Eggs kept on peat moss from non-annual killifish should be kept in moist peat. Eggs should be checked over the incubation time every other day. Remove any white or fungused eggs. Use a flashlight to shine on the eggs to inspect for eyes. Once you see the baby develop, it close to hatch! As all incubation times are more of a guide than “rule”, you will want to check for eyes often!
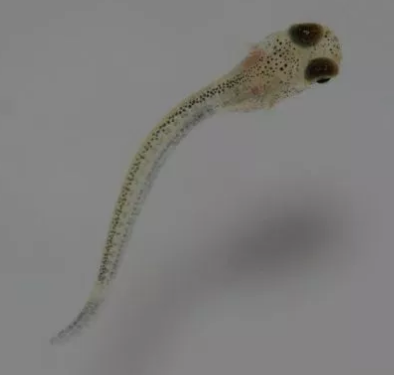
Once you see your babies looking back at you, add the peat to water or remove each egg. With annual species, it is recommended to wet the peat as well as the eggs. You should start seeing the fry in a few days! Make sure you keep the peat and eggs. You can rewet them about a week later and try again! Since we are adding the eggs to water to hatch, I add them to prepared baby tubs. These shoeboxes have some green water, cocopods, and daphnia monia living in them. I try to set this baby house up a week before the fry is ready. Take care that the water is not so green you cannot see the fry. Once you can see fry in your tub, add microworms.
Baby killifish need to be fed at least once a day. For fast growing fish like annuals or blue gularis, twice or three time feedings are needed to ensure a high survival rate of the fry. We are lucky that killifish fry tend to be very hardy! I often find mystery fry in my water change buckets!
The process of raising your own killifish is both fun and rewarding. Although hatching eggs may seem risky, it is a great way to add something very special to your fish room. Having 12 fry is more genetic diversity than a single pair!